
Commercial AC systems often become harder to manage over time, not because they stop working, but because key information is missing or outdated. Learn why keeping the right records matters, how it supports better decisions and compliance, and what information helps you stay in control of your system.
READ MORE
The true cost of a commercial HVAC system goes far beyond installation. Energy use, maintenance, repairs, and replacement all affect long-term expenses. This guide explains how a lifecycle approach can improve efficiency, cut operating costs, and help building owners make smarter, more sustainable HVAC decisions.
READ MORE
A building expansion can place new demands on an existing HVAC system, affecting comfort, efficiency, and long-term performance. Careful planning ensures the system continues to support the space as it grows. This guide outlines the key actions to take when preparing your HVAC system for a building expansion.
READ MORE
As a Mitsubishi Electric Accredited Installer, we’re recognised for meeting the highest standards in system design, installation, and aftercare. Our accreditation gives customers access to extended warranties, expert technical support, and the assurance that every system is installed for long-term performance, efficiency, and compliance.
READ MORE
From design and installation to maintenance and upgrades, Loughborough Air Conditioning supports East Midlands businesses with complete temperature control solutions. Our team handles every step, ensuring systems run efficiently, safely, and reliably while meeting the specific needs of commercial and industrial environments.
READ MORE
F-Gas rules place strict duties on businesses running air conditioning or refrigeration systems, but many operators aren’t clear on what’s required. This guide breaks down the essentials - who’s legally responsible, how to check if your system is affected, and the steps to stay compliant.
READ MORE
When a commercial AC system fails, your warranty can be the difference between a quick repair and a costly setback. But many businesses don’t fully understand what’s included. This article explains how warranties work, where the gaps often are, and how to make sure your cover stays valid for the long term.
READ MORE
Looking to have air conditioning installed? Don’t rush into the cheapest option. There’s a lot to consider for your protection, like proper certification, accurate pricing, and safety checks. Learn why a home survey is such an important part of the process, and what to expect when you book one with us.
READ MORE
If you’re looking for a dependable air conditioning provider for your business, it’s important to choose a company you can trust. We’re proud to be a Fujitsu Infinity Partner, a recognition of our expertise and commitment to delivering quality solutions.
READ MORE
Cooling capacity is one of the most important aspects of commercial air conditioning design. It determines how well a system can regulate indoor temperatures by removing heat from the space. Whether you’re upgrading an old system or installing a new one, understanding cooling capacity helps ensure energy efficiency, occupant comfort, and cost-effectiveness.
READ MORE
Do you have a passion for engineering? Are you looking to kick start a rewarding career? At Loughborough Air Conditioning, we’re offering a talented individual the chance to join our team as a full-time trainee Refrigeration and Air Conditioning Engineer.
READ MORE
Are you sure your air conditioning is serviced as often as it should be? Many systems face unnecessary wear or costly breakdowns due to neglected maintenance. Our guide explains how to set the right schedule for your business, ensuring efficiency, reliability, and a longer system lifespan.
READ MORE
How do you choose the right installer for your air source heat pump? One that offers expertise, transparency, and reliability. TrustMark accreditation guarantees a smoother, safer installation, protecting your investment and giving you peace of mind. Read our latest post to explore all the benefits in detail.
READ MORE
Like all mechanical equipment, commercial air conditioning has a lifespan. But signs of wear and tear don’t always mean a full replacement is necessary. In this guide, we talk you through the key things to consider when deciding whether to repair or replace your system.
READ MORE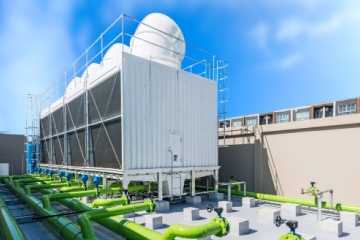
Industrial facilities need cooling solutions tailored to their demands, and different cooling methods exist to meet these varied requirements. In this guide, we break down key types - from air-cooled to VRF systems - helping you match the right technology to your facility's needs.
READ MORE
Curious about heat pumps? Find out exactly what’s involved in the installation process. From choosing the right system to annual maintenance, this guide covers everything you need to know to add an efficient, professional setup to your home.
READ MORE
Getting your heat pump ready for winter ensures maximum efficiency and minimum chance of breakdown. From cleaning the outdoor unit to testing the defrost mode, taking these steps can keep your home warm and your energy bills low.
READ MORE
A zoned heating and cooling system allows for precise temperature control in different areas of a building. This can improve energy efficiency and comfort in commercial properties. Learn more about how zoned systems work, their installation process, and common applications.
READ MORE
If you’re investing in air conditioning for an industrial or commercial property, it’s imperative that the system you have installed is designed effectively. You’ll want to guarantee consistent performance, maximum efficiency and lifespan, value for money, and minimum disruption during installation. Here’s how we approach the design process with your business interests in mind.
READ MORE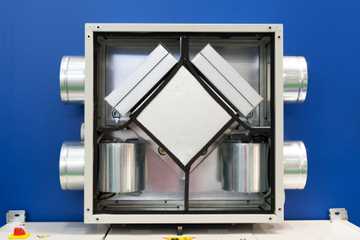
MVHR may not be suitable for every type of property, but where it is a feasible solution it provides healthy ventilation, increased energy efficiency and long term cost savings. In our latest post, we look at how to determine if MVHR is right for your needs, and how to approach the installation process.
READ MORE
